
|
|
| Printable version of Act II Quests |
| Radament's Lair | ||||
Quest Icon |
Quest Given By Atma |
Quest Location Lut Gholein Sewers |
Quest Goal Kill Radament |
Quest Reward extra skill point, the Horadric scroll, and shopping discounts |
|
How to get there: Lut Gholein (W)
(W) indicates a Waypoint location | ||||
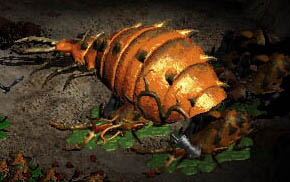
| You will find Radament in the sewers under Lut Gholein. There are two entrances to the sewers; either through the trap door in Lut Gholein, or the entrance on the edge of town. Radament will be found on the third level of the sewers. He can raise the undead, is extra fast, both in attack rate and speed, and is magic resistant. When you've killed him, pick up the book of skill, and use it to receive an extra skill point. Also, locate and open the chest in his lair, in which you'll find the Horadric scroll. When you return to town, be sure to speak to Atma, and she will arrange for you to get discounted prices with all the merchants in town. | ||||
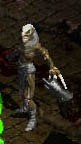 Radament |
 Book of Skill |
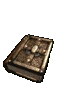
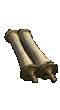 Horadric Scroll |
||

| The Horadric Staff | ||||
| Quest Icon |
Quest Given By Cain |
Quest Location Halls of the Dead, Maggot Lair, Claw Viper Altar |
Quest Goal re-assemble the Horadric Staff |
Quest Reward the Horadric Staff |
|
How to get there: For the Cube: Lut Gholein (W) For the Shaft: Lut Gholein (W) For the Amulet: Lut Gholein (W) (W) indicates a Waypoint location | ||||
| Talk to Cain with the Horadric scroll in your inventory to start this quest. You need to find the Horadric Cube, the Horadric Shaft, and the Horadric Amulet, and combine them to re-assemble the Horadric Staff. The Horadric Cube will be found on level 3 of the Halls of the Dead. The cube will be protected by Bloodwitch the Wild, an extra strong, cursed huntress. The Horadric Shaft will be found in a chest inside the Maggot Lair. The shaft will be protected by Coldworm the Burrower, a unique Sand Maggot, who is cold enchanted and magic resistant. The Horadric Amulet will be found on the Claw Viper Altar, which is located on level 2 of the Claw Viper Temple. You must destroy the altar to get the amulet. The altar will be protected by Fangskin, who is lightning enchanted. Once you have obtained all the items, open the Cube, place the shaft and amulet inside it, and press the transmute button to receive the Horadric Staff. |
||||
 Horadric Cube |
Horadric Amulet |
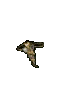
Bloodwitch |
 Fangskin |
|
 Coldworm |
||||
| The Tainted Sun | ||||
Quest Icon |
Quest Given By entering the Lost City and speaking with Drognan |
Quest Location Claw Viper Temple |
Quest Goal destroy the Claw Viper Altar to end the curse |
Quest Reward Horadric Amulet |
|
How to get there:
Lut Gholein (W)
(W) indicates a Waypoint location | ||||
| This quest will be activated while you are completing the Horadric Staff quest, when you enter the Lost City. On your next return to Lut Gholein, speak with Drognan to receive the quest. Destroy the altar on the second level of the Temple. The altar will be protected by Fangskin, who is lightning enchanted. You will receive the Horadric Amulet needed for the Horadric Staff quest, and you will remove the curse and end the darkness. | ||||
|
Horadric Amulet |
Fangskin |
|||
| The Arcane Sanctuary | ||||
Quest Icon |
Quest Given By Jerhyn and Drognan |
Quest Location Arcane Sanctuary |
Quest Goal retrieve Horazon's Journal |
Quest Reward symbol identifying the true tomb of Tal Rasha |
|
How to get there: Lut Gholein (W)
(W) indicates a Waypoint location | ||||
| Speak to Jerhyn, and then Drognan to activate this quest. The portal to the Arcane Sanctuary is in the Palace Cellar. Locate Horazon's Journal, which will be found on a pedastal and guarded by the Summoner. Once you acquire Horazon's Journal, a portal will be open that will take you to the Canyon of the Magi, to get to Tal Rasha's tomb. Horazon's Journal will show the correct symbol to identify the entrance into the true tomb of Tal Rasha. | ||||
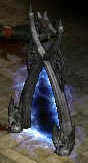 Arcane Sanctuary Entrance |
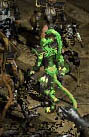
 The Summoner |
 Arcane Sanctuary |
||
| The Summoner | ||||
Quest Icon |
Quest Given By |
Quest Location Arcane Sanctuary |
Quest Goal kill the Summoner |
Quest Reward magic item |
|
How to get there: Lut Gholein (W)
(W) indicates a Waypoint location | ||||
| This quest will be activated when you find the Summoner in the Arcane Sanctuary. The Summoner is a very tough spell-caster, who specializes in cold spells. Once killed, pick up Horazon's Journal, and a portal will open to the Canyon of the Magi, in which you will find the entrance to Tal Rasha's Tomb. | ||||
Arcane Sanctuary Entrance |
The Summoner |
Arcane Sanctuary |
||
| The Seven Tombs | ||||
| Quest Icon |
Quest Given By Jerhyn |
Quest Location Tomb of Tal Rasha |
Quest Goal Find the true Tomb of Tal Rasha |
Quest Reward magic item and passage to Act III |
|
How to get there: Lut Gholein (W)
(W) indicates a Waypoint location | ||||
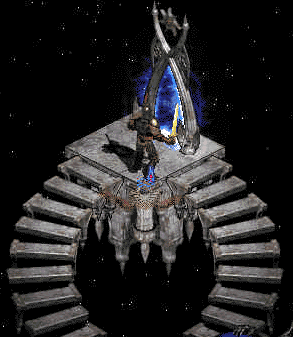
| Activate this quest by speaking with Jerhyn after Radament has been killed. You must enter the true Tomb of Tal Rasha (identified by the symbol on the pillars on either side of the entrance), and insert the Horadric Staff into the Orifice in the center of the circle of seven symbols, which will open the passage into Tal Rasha's burial chamber. Inside you will find Duriel, who possesses cold attacks and a powerful melee attack. He has 100% resistance to cold attacks, and 20% resistance to all others. Once he has been killed, locate the Archangel Tyrael, who is nearby. A portal back to Lut Gholein will open; speak with Jerhyn, who will tell you that Meshif will now sail you to Kurast, when you are ready. | ||||
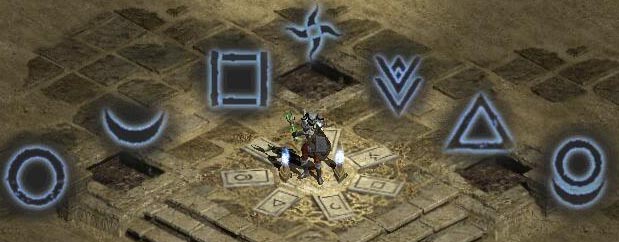 Symbols to Tal Rasha's Tomb | ||||
 Opening Tal Rasha's Tomb |
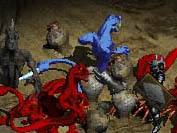
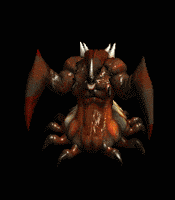 Duriel |
|||
BLIZZARD, DiabloII, Diablo 2 Resurrected, and Reign of the Warlock are trademarks of Blizzard |
| Send mail to the webmistress with questions or comments about this web site. Diablo II game images are copyright Blizzard. HTML content and website images on The Diablo II Tomb of Knowledge are copyright. Reproduction of content from this site on another server is not allowed. Copyright © 1999 - 2026 Last modified: February 17, 2026 Visit my homepage |